How to Use a Depth Caliper for Hole, Slot, and Step Measurement
Depth measurement looks simple until the result starts affecting fit, clearance, or assembly performance. A hole that is too shallow may stop a fastener or insert from seating correctly. A slot with uneven depth may affect tool travel or part positioning. A shoulder height that is measured incorrectly can lead to stacking errors later in assembly.
That is why a depth caliper is such a practical tool in workshop inspection. It provides a direct and efficient way to measure recesses, grooves, steps, and holes without moving to a more complex machine.
This guide explains how to use a depth caliper correctly, what to watch during measurement, and how to avoid the most common reading mistakes.
What a Depth Caliper Measures
A depth caliper is designed for measurements where the critical feature is below a reference surface. Common examples include:
-
blind hole depth
-
slot depth
-
groove depth
-
step height or shoulder depth
The tool works by placing its base flat on the reference surface while the measuring rod or blade extends downward to contact the bottom of the feature.
If you are browsing current product families, the starting point is the Depth Caliper category.
Before You Measure
Good results begin before the first reading.
Clean the tool and the workpiece
Dust, chips, oil film, or burrs can all affect the measurement. The base of the depth caliper must sit flat on the reference surface.
Check zero
Close the tool fully and confirm that it returns to zero if the model supports a zero reference check. Even a small offset can affect repeated inspection.
Confirm the reference surface
Depth is only meaningful when measured from the correct surface. In some parts, the top face is the reference. In others, the functional datum may be a machined shoulder or a fixture surface.
How to Measure Hole Depth
Hole depth is one of the most common depth caliper tasks.
Step 1: Place the base flat on the top surface
The base must rest evenly without rocking. If the tool is tilted, the reading will be unreliable.
Step 2: Extend the depth rod slowly
Lower the rod into the hole until it touches the bottom surface. Use light contact only. Pressing too hard can create a false reading.
Step 3: Read the scale or display
Once the contact is stable, read the value. If you are using a vernier type, follow the same reading discipline described in the site article on vernier caliper reading.
Step 4: Repeat the measurement
For critical dimensions, repeat the measurement two or three times to confirm consistency.
How to Measure Slot Depth
Slot depth requires the same general method, but stability becomes even more important because the contact area can be narrower.
Best practice for slot measurement:
-
keep the base fully supported
-
position the rod at the true bottom of the slot
-
avoid measuring on burrs or radius transitions
-
repeat the check at more than one location if the slot may vary
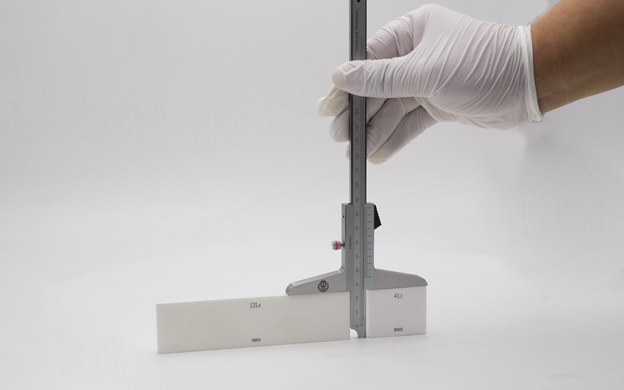
How to Measure Step or Shoulder Height
Depth calipers are also useful for step measurement when the tool is positioned correctly.
To do this:
-
place the base on the higher reference surface
-
extend the measuring rod to the lower surface
-
confirm the rod contacts the intended measuring face rather than an edge radius
This method is common in machined components with multiple levels or relief features.
Common Depth Measurement Mistakes
Tilting the tool
If the base is not flat, the reading may be too large or inconsistent.
Measuring on chips or burrs
Even a small burr at the hole entrance or slot edge can change the result.
Pressing too hard
Depth tools should touch, not force. Excess pressure can distort the contact condition.
Reading from the wrong reference surface
This is a process mistake rather than a tool mistake, but it is a very common cause of incorrect inspection records.
Not repeating the measurement
One reading may be enough for rough checks, but repeat measurement is safer for acceptance inspection.
How to Choose a Depth Caliper
When selecting a depth caliper, buyers should focus on:
-
measuring range
-
resolution or least count
-
base stability
-
readability of the scale or display
-
workshop conditions and operator skill
A shop that values battery-free use may prefer a vernier model. A team that wants faster reading may prefer a digital model.
FAQ
What is a depth caliper used for?
A depth caliper is used to measure holes, slots, grooves, and steps from a flat reference surface down to the measured feature.
Can I use a standard caliper to measure depth?
Some standard calipers can perform limited depth checks with the depth rod, but a dedicated depth caliper is usually better for stability and repeatability.
Why do my depth caliper readings vary?
The most common causes are tool tilt, poor surface cleanliness, measuring on burrs, or inconsistent contact pressure.
Conclusion
Using a depth caliper well is less about force and more about control. When the base is flat, the contact is light, and the reference surface is correct, the tool provides fast and reliable measurements for many workshop tasks.
For industrial users, depth calipers are especially useful because they bridge the gap between simple hand tools and larger inspection equipment. With correct technique, they support accurate checking of holes, slots, and step features in everyday production work.